Amazon AWS S3 CDN & Cloudflare R2 media server – PrestaShop module

Compatibility
PrestaShop 1.7.x – 9.x
Download documentation
Amazon AWS S3 CDN & Cloudflare R2 media server.pdf
YouTube video
https://youtu.be/E2HvnZbIpfE
Goal
Amazon AWS S3 CDN & Cloudflare R2 media server is PrestaShop module which speeds up your online store by transferring most of your store files to CDN and keep loading them from Amazon AWS S3 cloud or & Cloudflare R2. Module replaces standard media server and provides much more flexible system of settings and file control.
Benefits for Merchants
- admin can determine which files need to be placed in the cloud: by category (theme, modules, etc), by type, by extension;
- finely manage files that need to be loaded from server or cloud;
- admin can upload any file from cloud back to the server if necessary;
- admin can use AWS S3 Bucket or AWS Cloud Form;
- admin can use Cloudflare R2;
- use for FRONT-END files only without any risks for back-end functionality;
- budget-reduction for store comparatively with regular hosting, high scalability, security and durability of AWS.
Benefits for customers
- customer will get parallel content loading streams while opening the site, so the speed will be higher comparatively with pure hosting-located files of the site;
- security and accessibility of files, located on AWS / Cloudflare R2 – content will be available 100% of time even if hosting could not respond due to high load, etc;
- speed of store loading is the benefit for any customer.
Features
- admin can upload all or selected files to AWS cloud or Cloudflare R2. It’s possible to determine which files need to be uploaded there (by extension or type, etc). Admin is allowed to upload theme files to cloud, but keep modules files on hosting, so the settings are very flexible;
- admin can return any selected file from cloud so that this file will be loaded from hosting. It’s possible to get this file back to cloud anytime;
- files source links in HTML code will be automatically updated according to location of the files: cloud or own hosting. In case admin changes settings (replaces source from cloud to hosting or vice versa), source links will be updated accordingly, so no broken images, links, etc. will occur.
Module settings
1. “Configuration” tab
Amazon AWS connection settings:
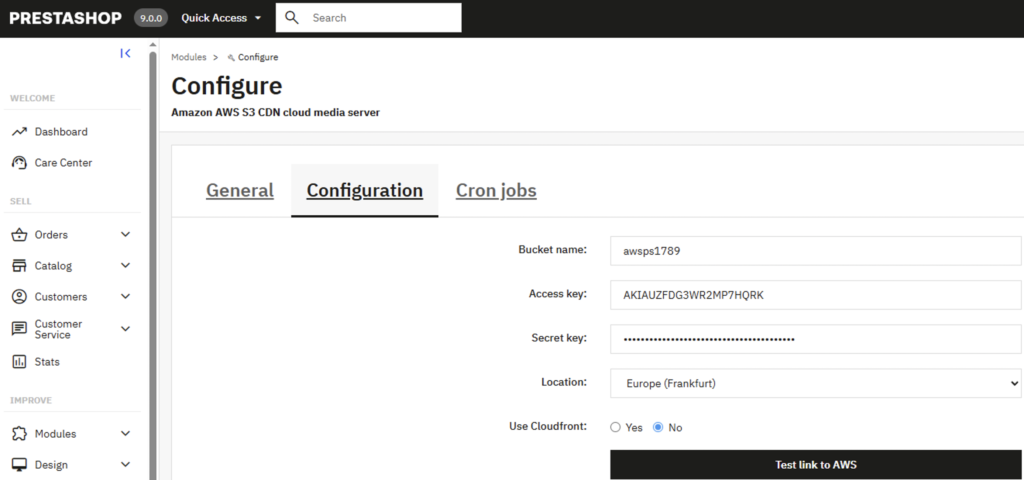
- Storage service – possibility to choose the bucket service (AWS S3 or Cloudflare R2)
- Bucket name – your Bucket name of Amazon S3 service
- Access key – access key of your Amazon account
- Secret key – secret key of your Amazon account
- Location – AWS server location
- Use Cloudfront – (Yes/No) use Cloudfront. All links to files in Bucket will go through Cloudfront then
- Cloudfront ID – your Cloudfront ID
- Button Test link to AWS – button to validate data and test connection to bucket
Selecting files to upload to AWS and use on the site:
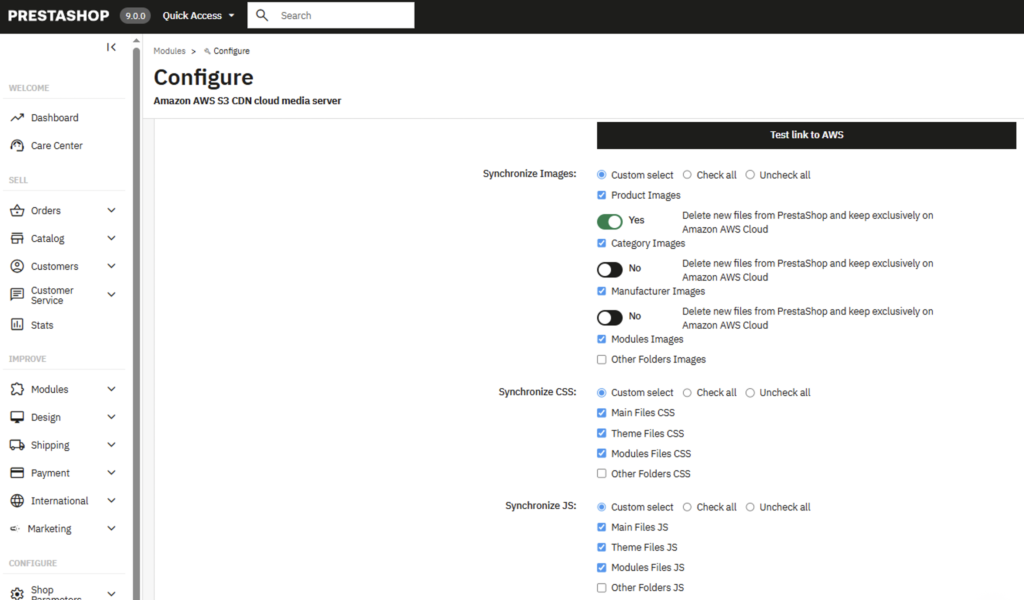
- Synchronize Images – upload style files to AWS
- Product Images – all product images
- Category Images – all category images
- Manufacturer Images – images (logos) of manufacturers
- Modules Images – images of modules on the site (sliders, banners, etc.) *
- Synchronize CSS – upload style files to AWS
- Main Files CSS – core files (located in /js)
- Theme Files CSS – your Theme Files
- Modules Files CSS – files of your modules
- Synchronize JS – upload JavaScript files to AWS:
- Main Files JS – main files (located in /js)
- Theme Files JS – your theme JS files
- Modules Files JS – JS files for your modules
New uploaded files management:
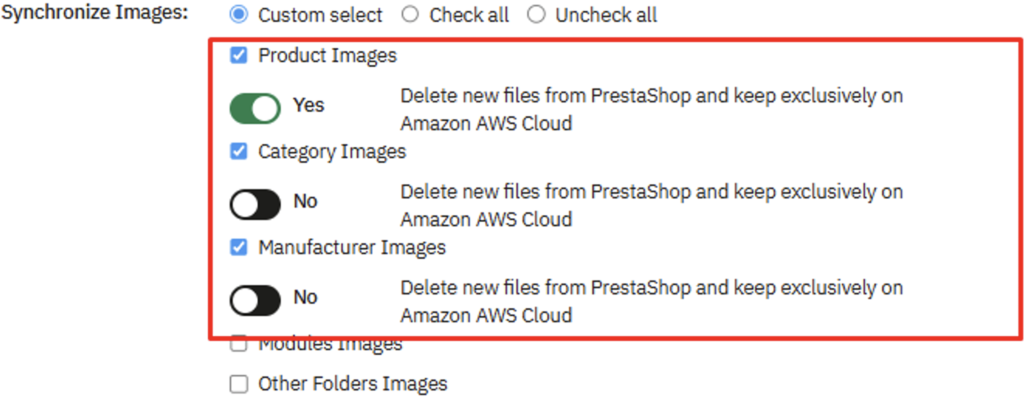
Added a switcher to automatically delete new files from the Prestashop server after uploading to Amazon AWS S3 for images of:
- Products
- Categories
- Manufacturers
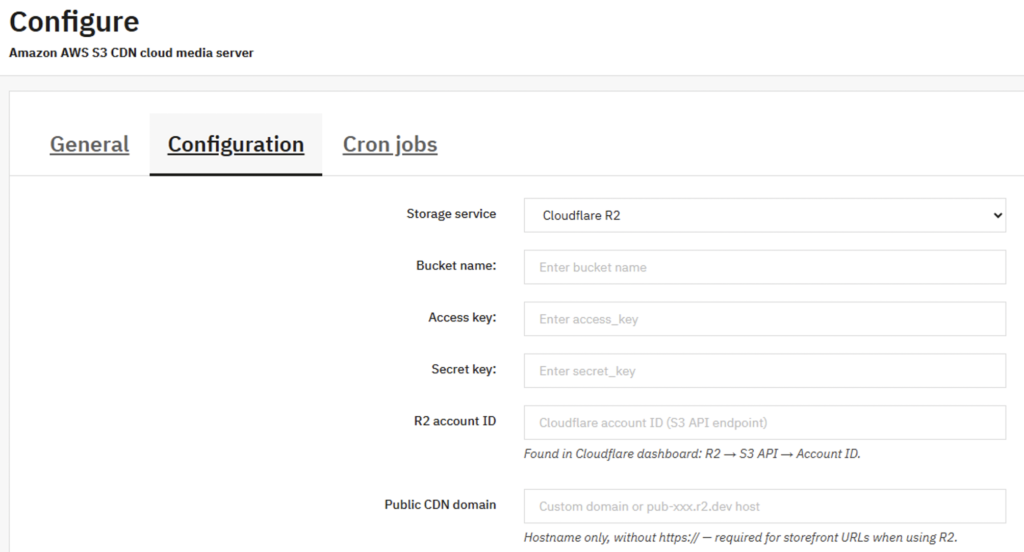
- Bucket name – your Bucket name of Cloudflare R2 service
- Access key – access key of your Cloudflare account
- Secret key – secret key of your Cloudflare account
- R2 account ID – a unique identifier assigned to a specific R2 bucket when it is created, which can be found on the bucket’s dashboard page.
- Public CDN domain – public domain name that will be used to link to files uploaded to the bucket
2. “General” tab
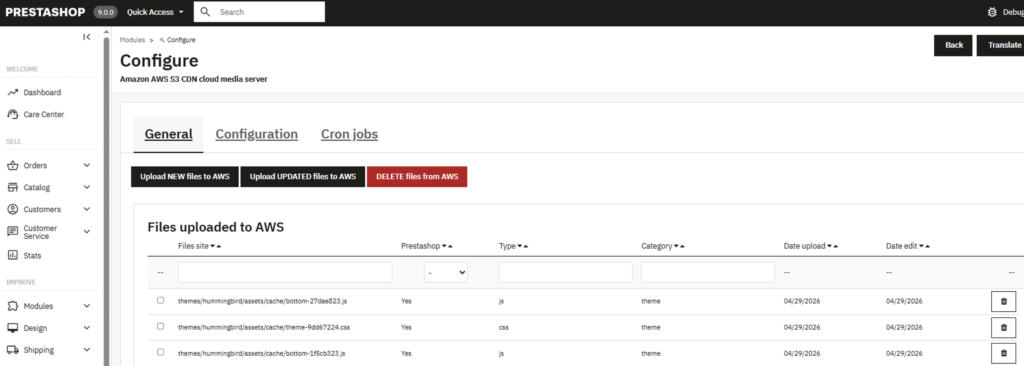
Buttons functionality:
- Upload NEW files to AWS – upload all files that match the settings on the Configuration tab
- Upload UPDATED files to AWS – upload only files that have been created and/or modified
- DELETE files from AWS – clear the entire cloud
Files table taking into account the specified settings:

- Files site– path to file from the root of the site
- Prestashop – whether the file is physically present on the Prestashop server
- Type – file type (image, css, js)
- Category – category of the file (product, category, manufacturer, modules, theme, main)
- Date upload – date the file was uploaded to AWS server
- Date edit – date the file was modified on server
File management buttons:

- delete file from AWS server
Advanced settings in Configuration:

You can change or add file extensions that will be uploaded to the AWS server.
Output hook position – the module checks if it is in the last position in the queue.
3. Product page:
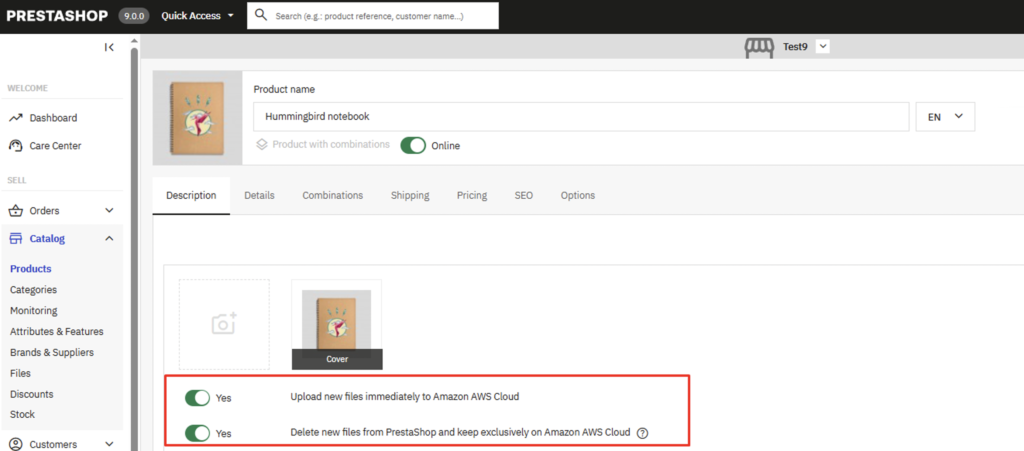
- Upload new files immediately to Amazon AWS Cloud – upload picture immediately to AWS
- Delete new files from PrestaShop and keep exclusively on Amazon AWS Cloud – delete image from PrestaShop server after upload to AWS S3
4. Category page
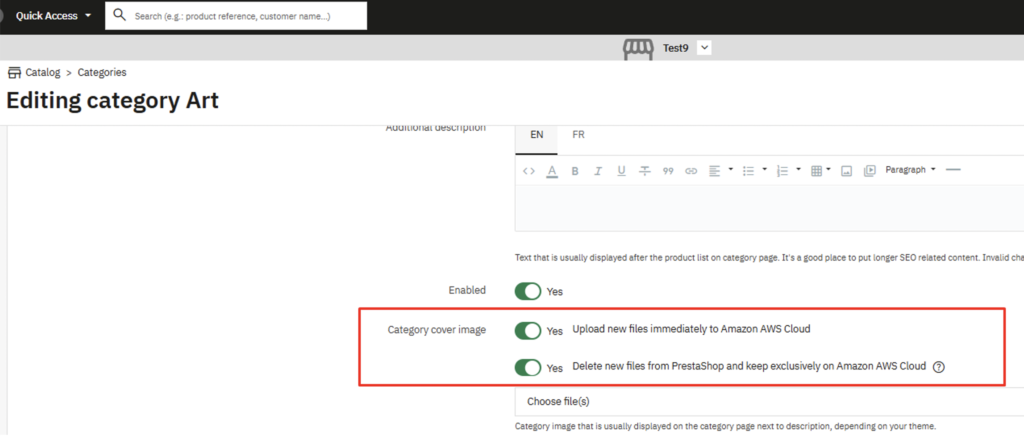
- Upload new files immediately to Amazon AWS Cloud – upload picture immediately to AWS
- Delete new files from PrestaShop and keep exclusively on Amazon AWS Cloud – remove image from PrestaShop server after upload to AWS S3
5. Brand page
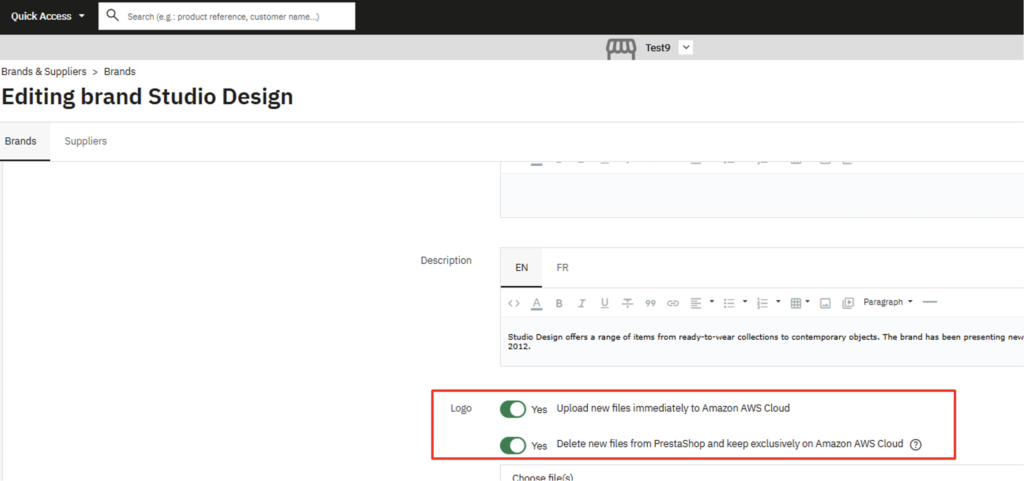
- Upload new files immediately to Amazon AWS Cloud – upload picture immediately to AWS
- Delete new files from PrestaShop and keep exclusively on Amazon AWS Cloud – remove image from PrestaShop server after upload to AWS S3
Attention! Keep in mind that if you select the ‘Yes’ option, all new media files will only be stored in the Amazon AWS Cloud and not on your PrestaShop store hosting! You must be aware of the implications of this setting and the risk of file loss.
Setting up AWS S3
- Register at https://aws.amazon.com/
- Go to the console and in the Services menu select Storage-> S3 (https://s3.console.aws.amazon.com)
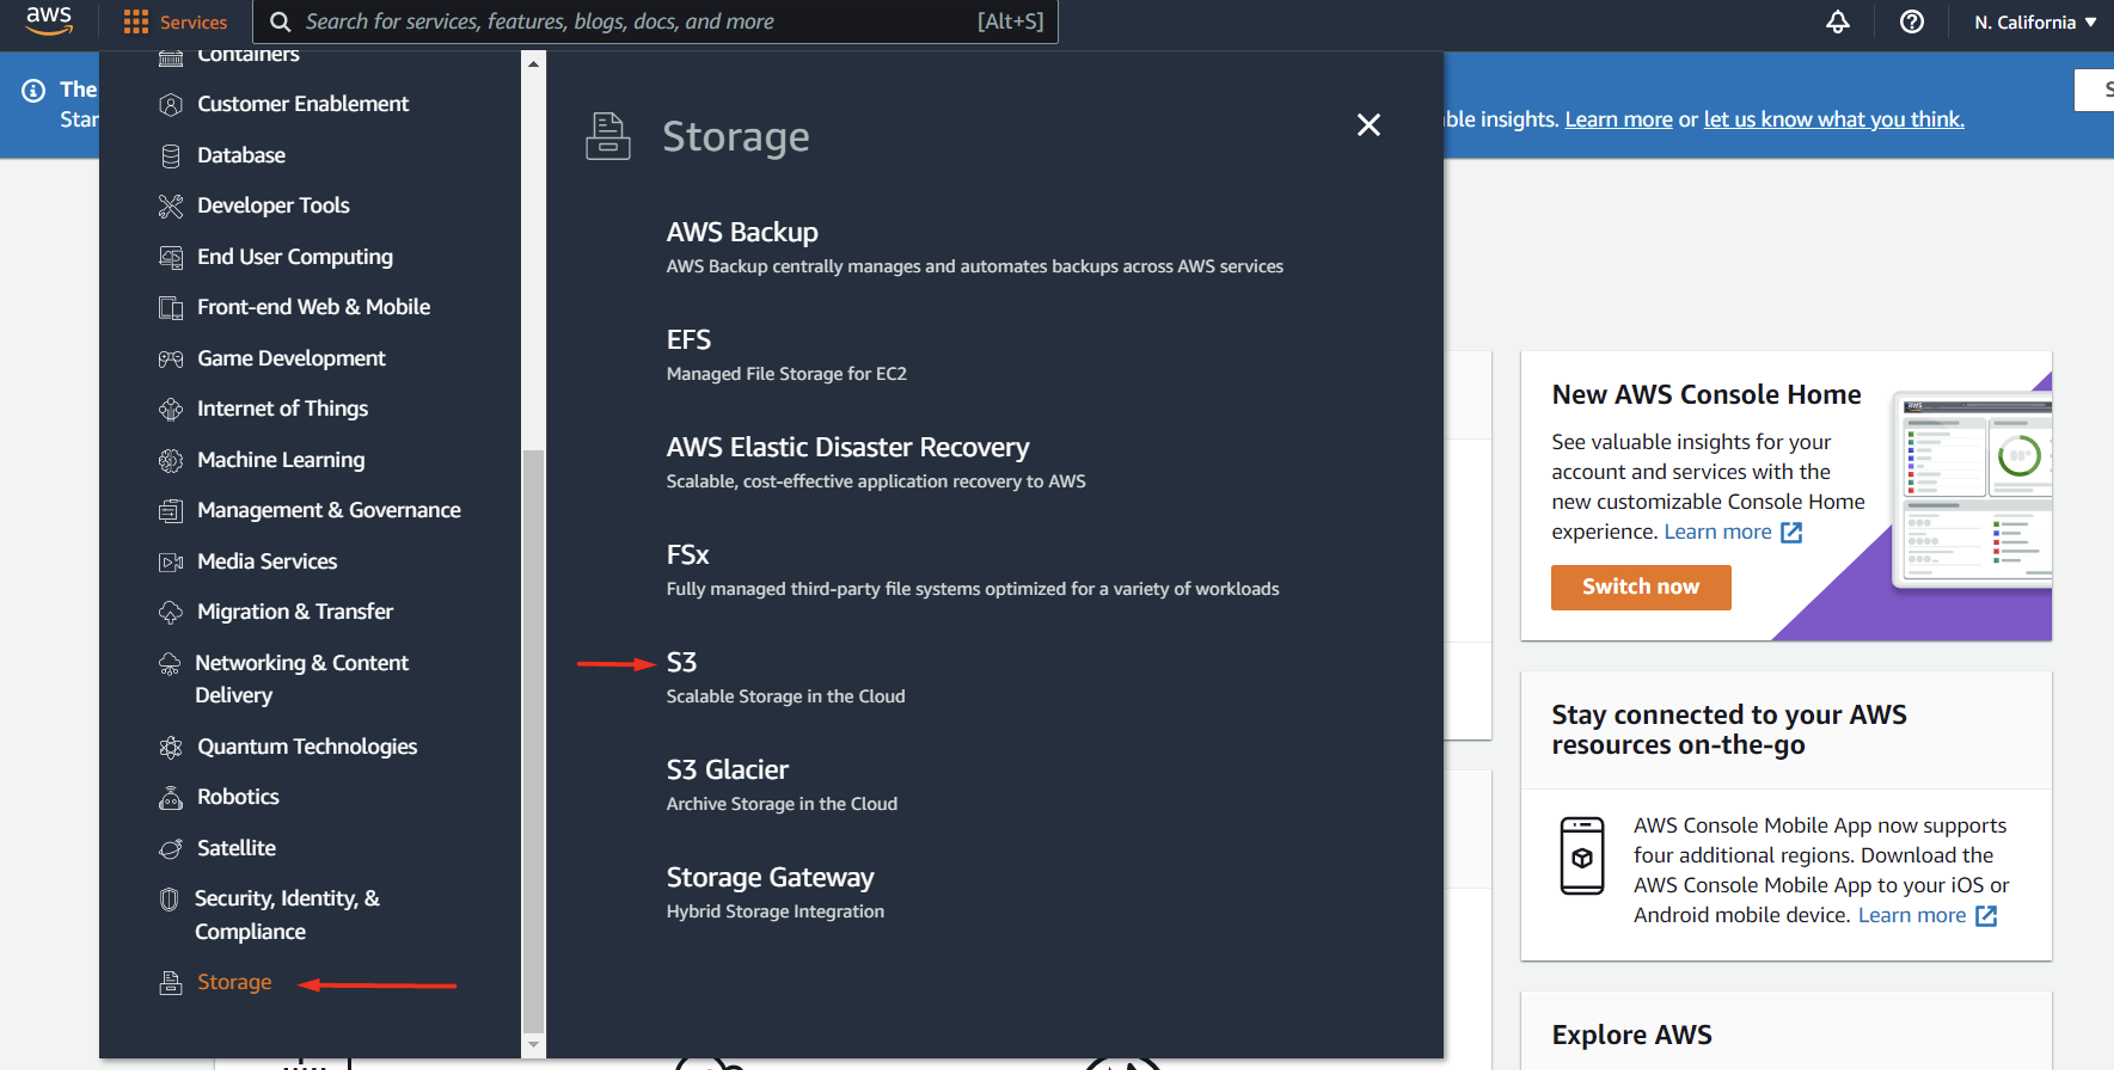
-
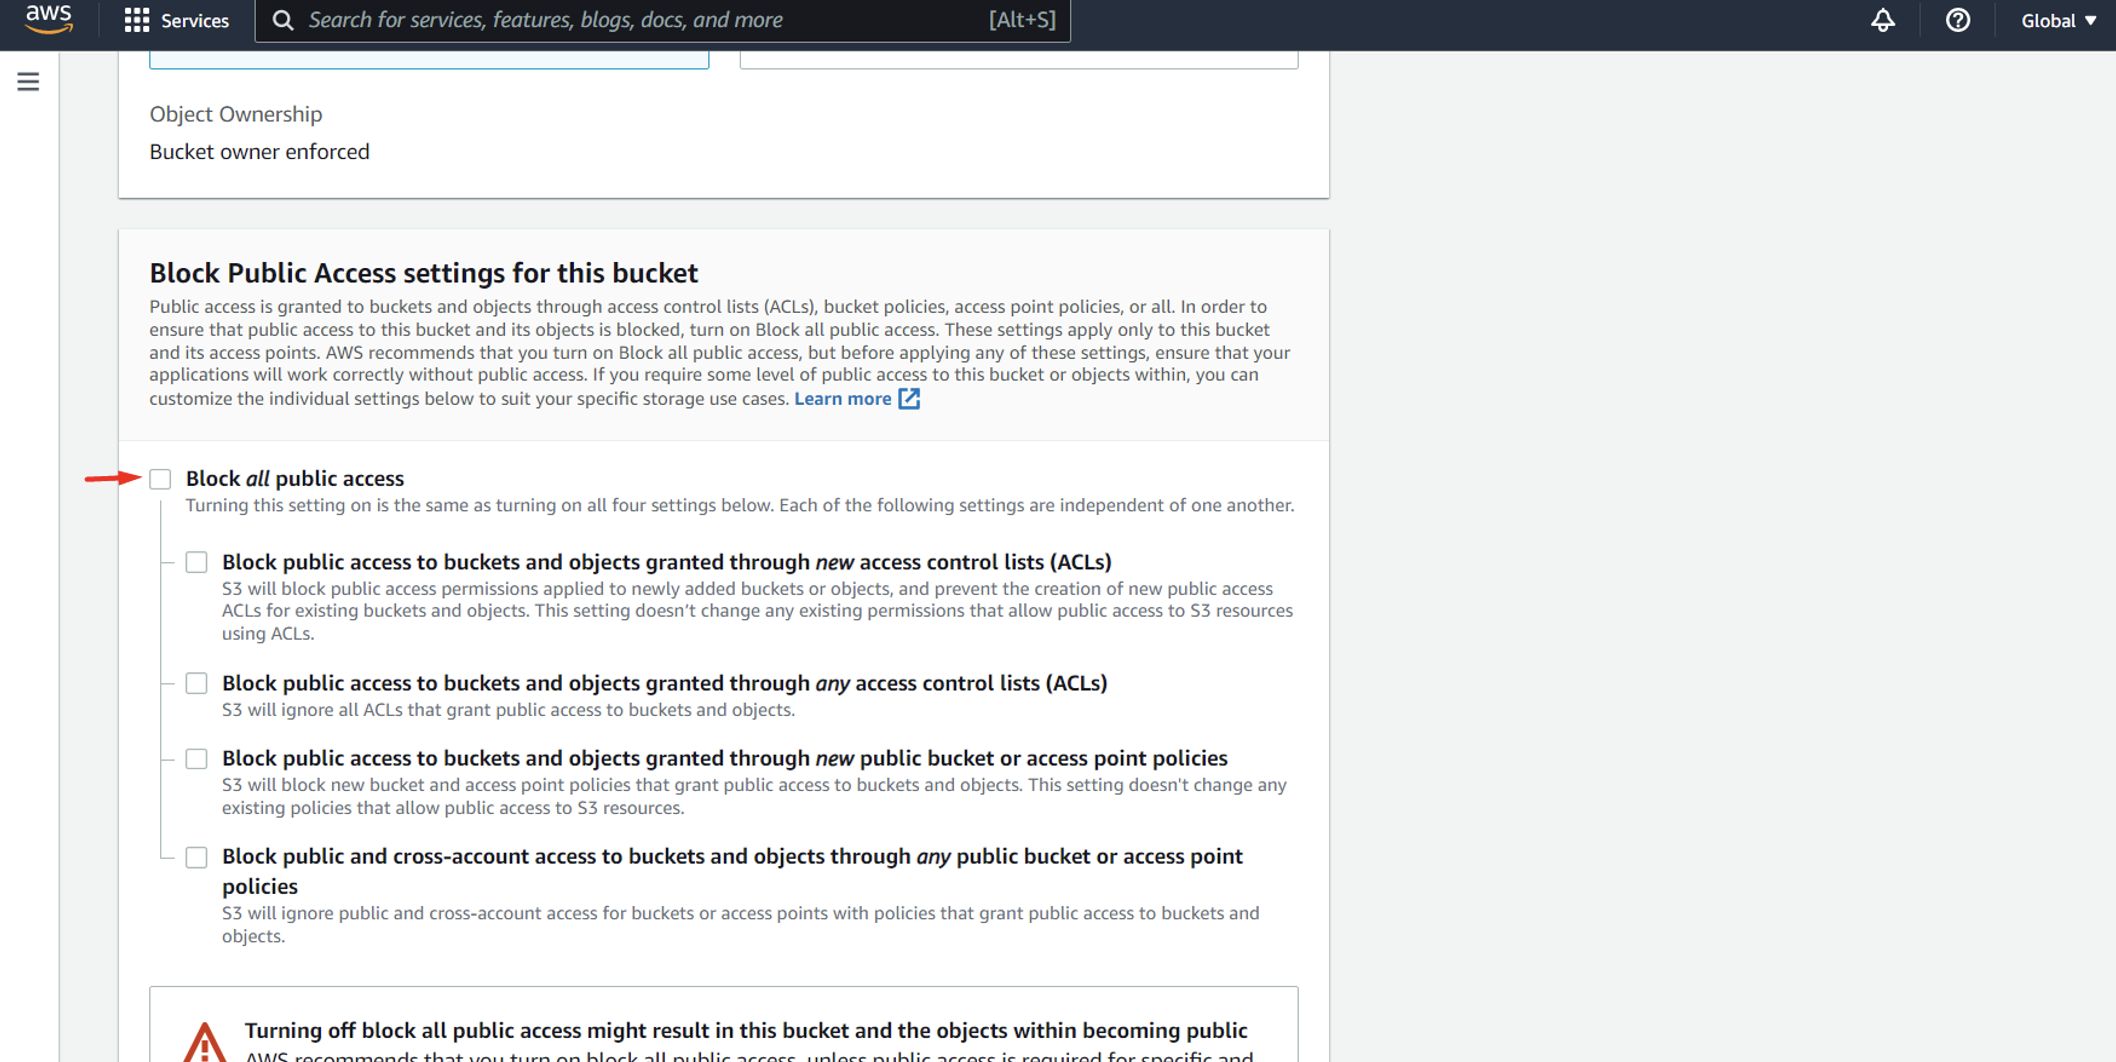
- Create your Bucket (Create bucket)
- Be sure to clear the checkbox when creating Block all public access

- After creating a Bucket, please open it and go to the tab Permissions > section Cross-origin resource sharing (CORS)
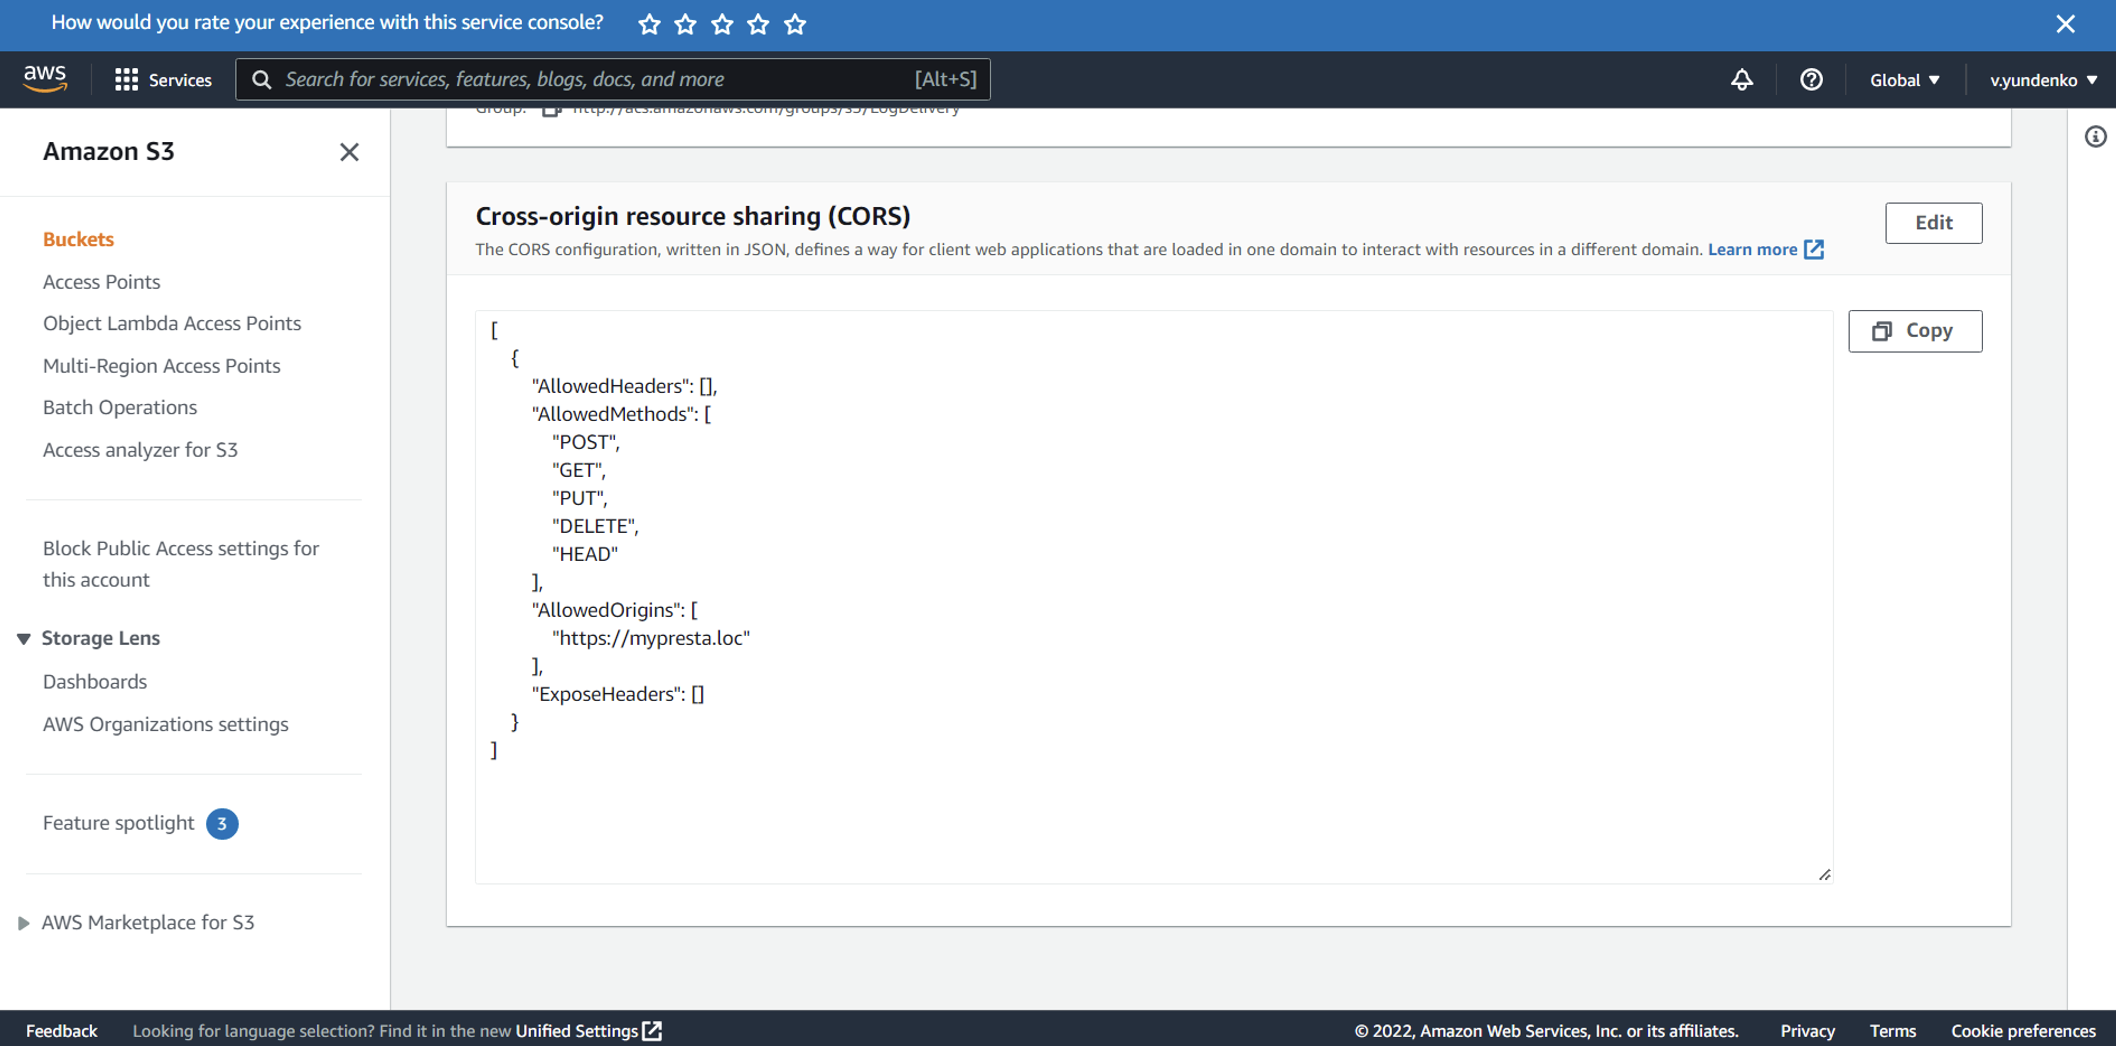
Click the Edit button and set up CORS (JSON format):
[
{
“AllowedHeaders”: [],
“AllowedMethods”: [
“POST”,
“GET”,
“PUT”,
“DELETE”,
“HEAD”
],
“AllowedOrigins”: [
“https://mypresta.loc”
],
“ExposeHeaders”: []
}
]
Where AllowedOrigins is your site URL.
Obtaining access keys:
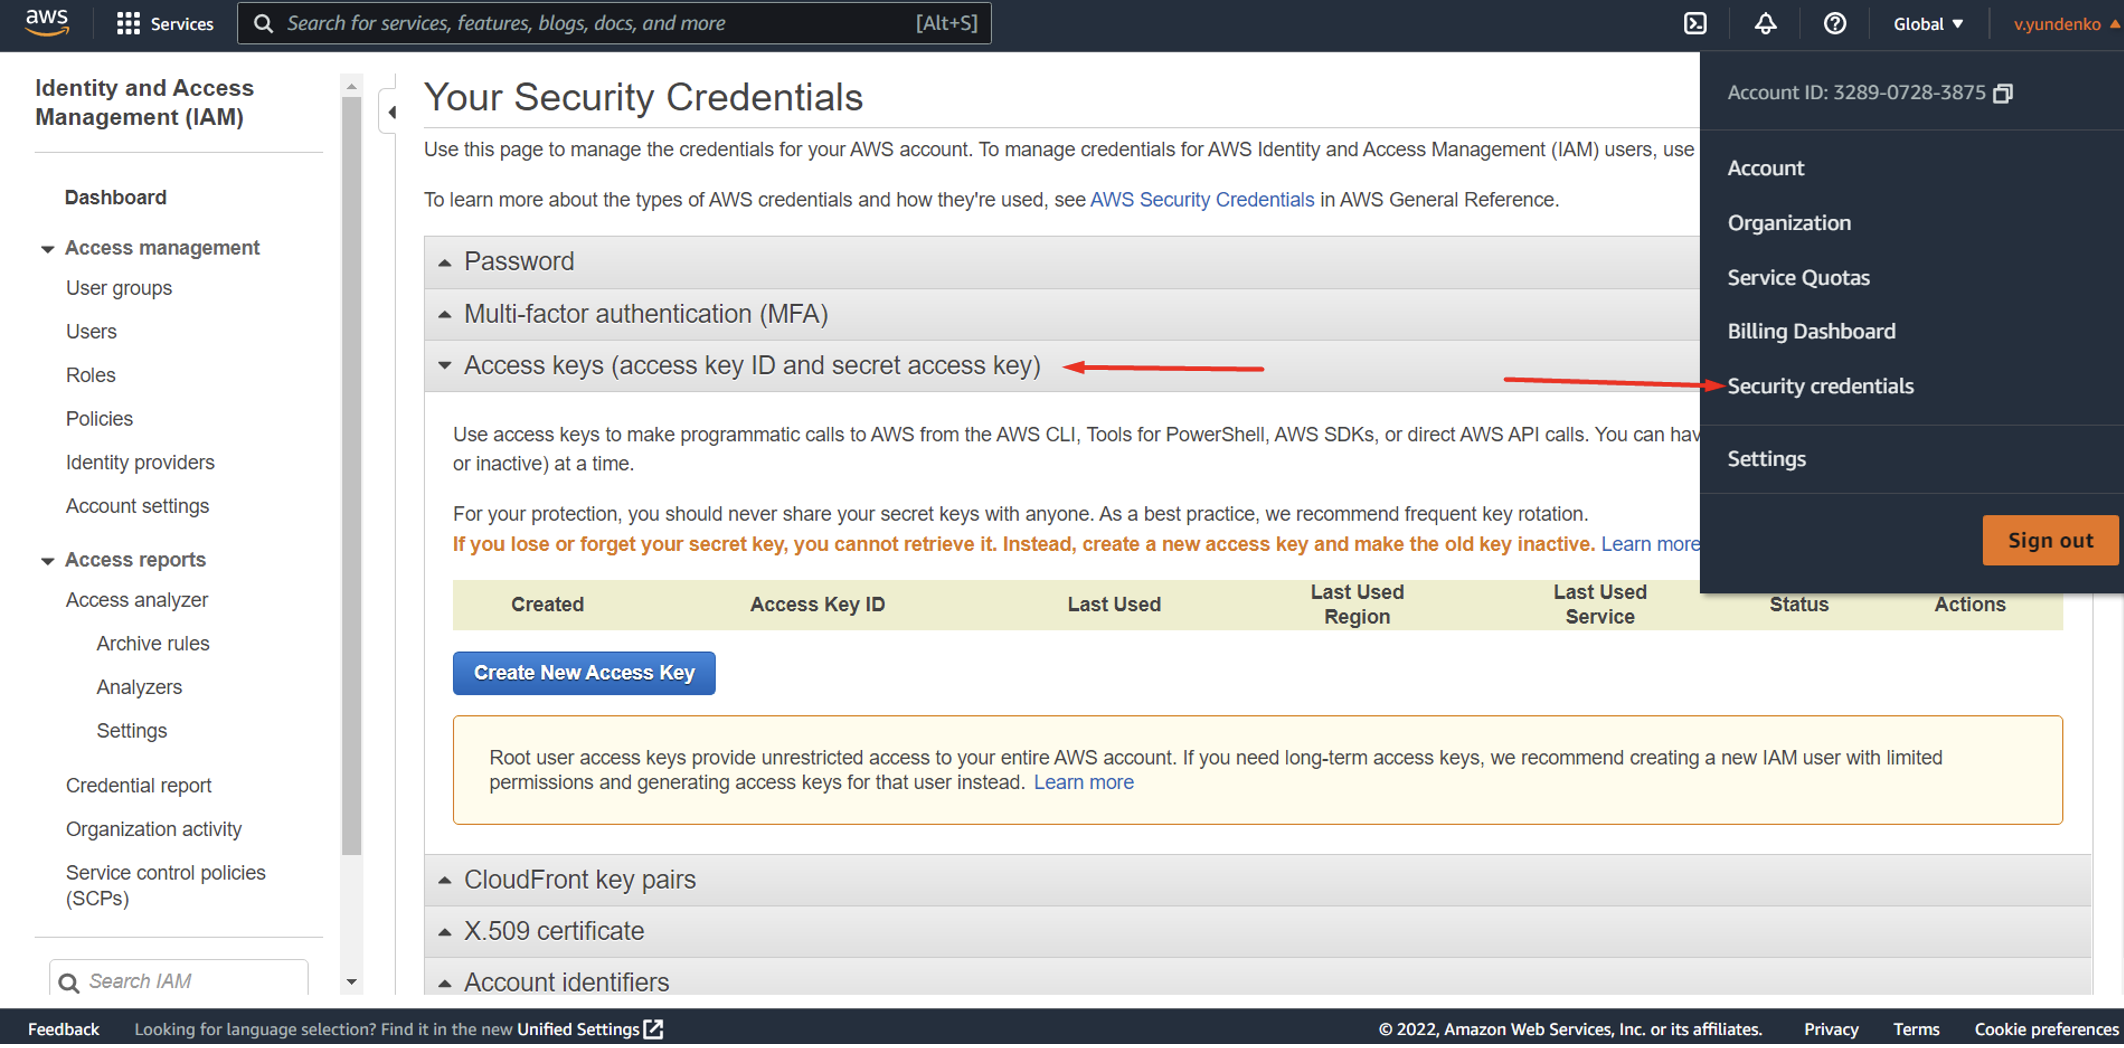
- Go to Security credentials ->Acces Keys
- Click on Create New Access Key
- Modal window will appear with a suggestion to save the key in a CSV file. Keep this file in a safe place. You will find Access key, Secret key in the file needed to configure the module.
Installation
– Upload the module through the Backoffice (Modules > Add New Module) or using FTP client
– Hit Install it and enter the configuration
Other remarks
Replacing styles and scripts URLs on the site:
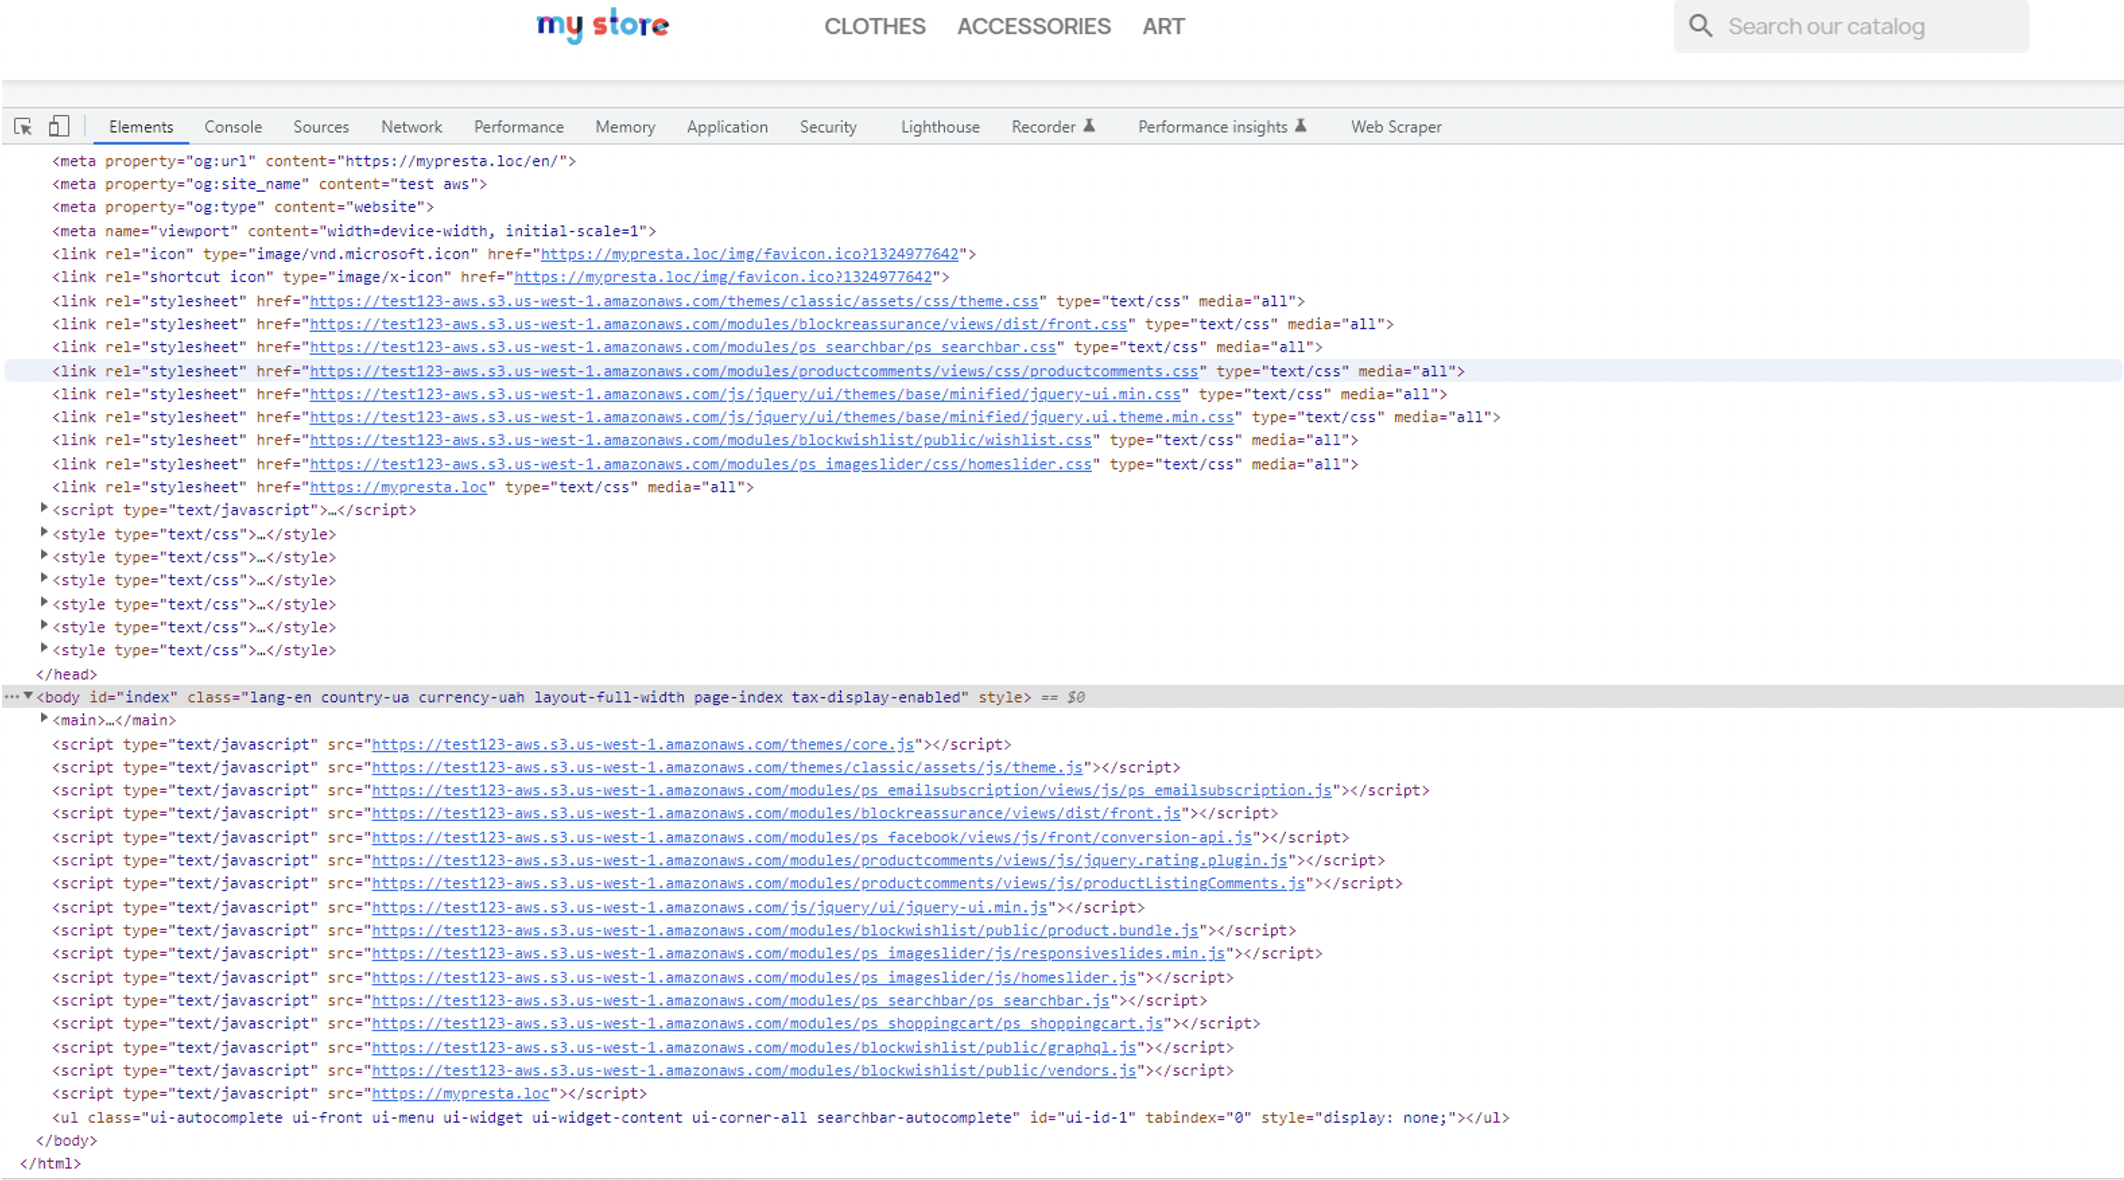
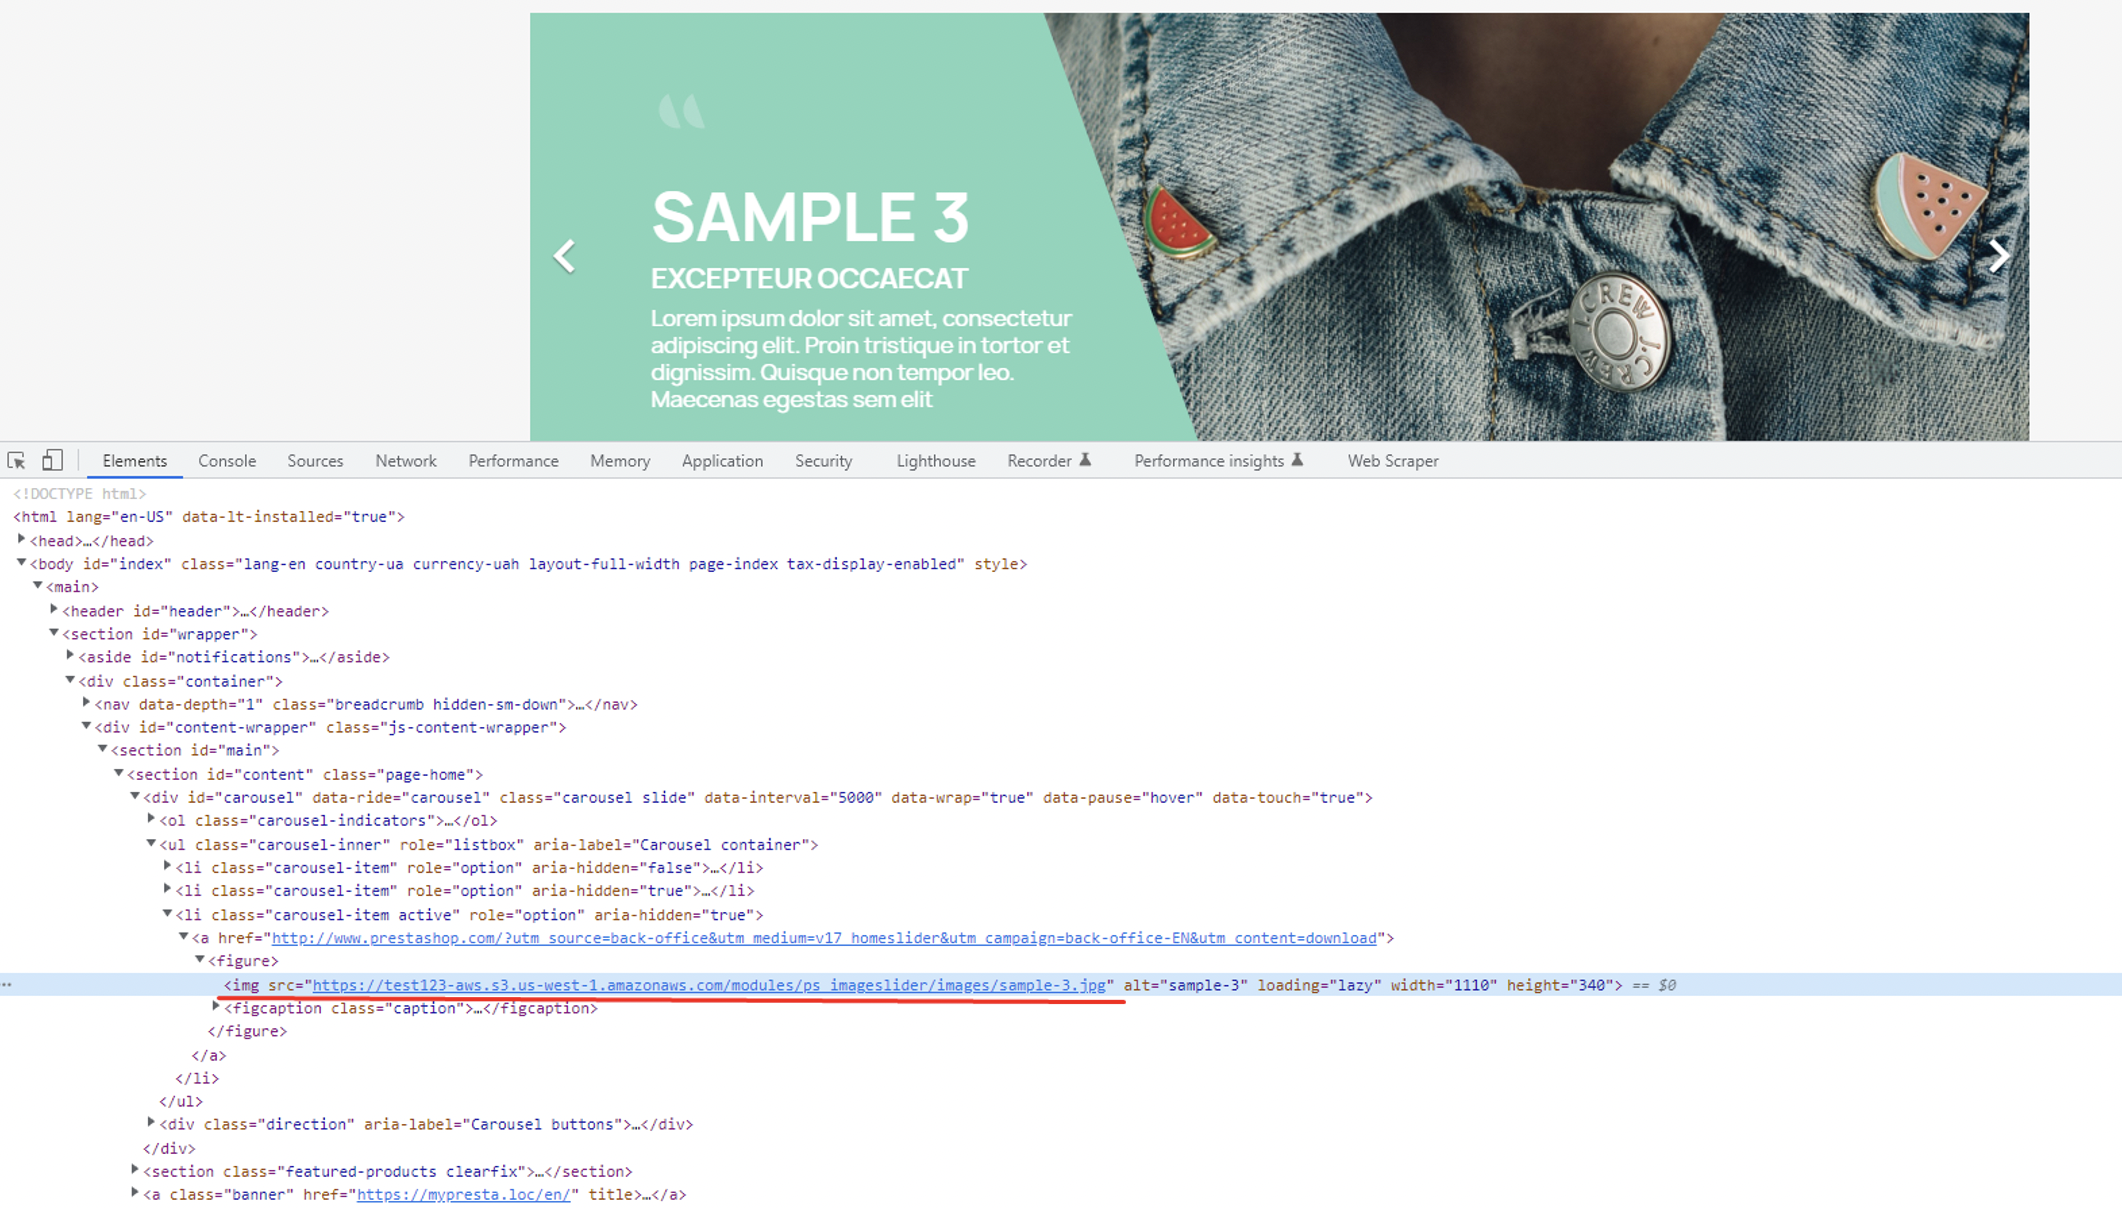
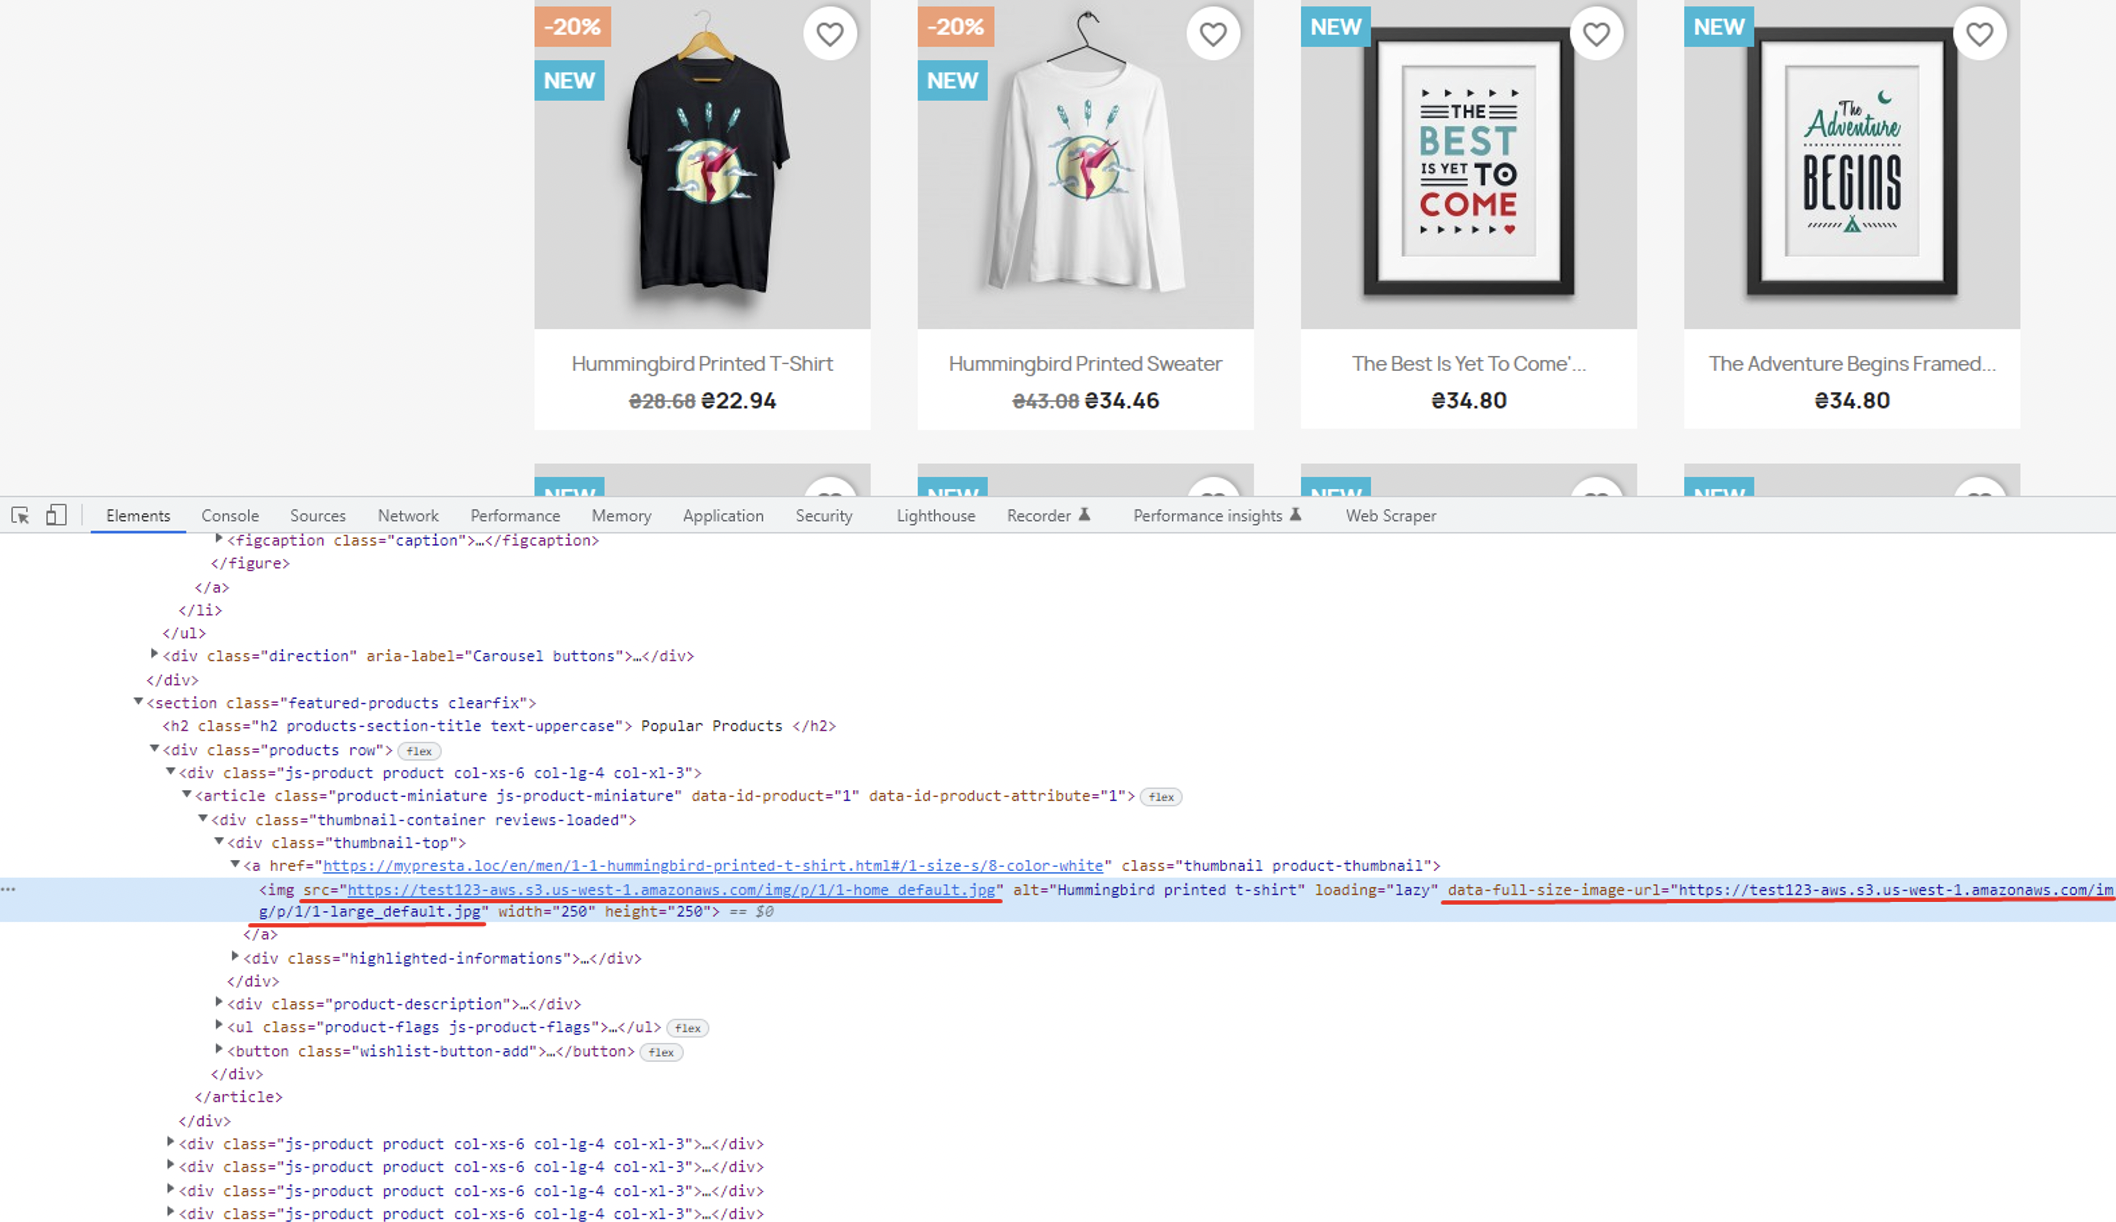
Replacing the url of images on the site:
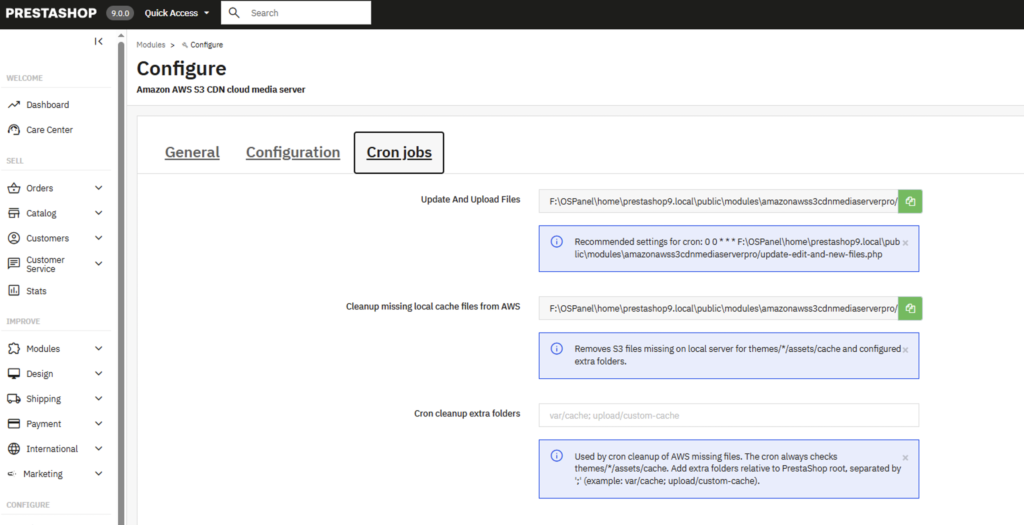
Attention! Module has console command to push on AWS. You can start updating the modification date of files, searching for new files (according to the module settings) and uploading them to the AWS cloud through the command line by running the file:
amazonawss3cdnmediaserver/update-edit-and-new-files.php
CRON jobs:
Prestashop Multishop
- Physical URL: supports
- Virtual URL: supports
Each store needs to set its own settings.